Pages

Friday, 30 September 2016

JAI 331 Just add wings - paisley butterfly


Interrupting my Foxy Friends project week to ask... Are you ready for a new challenge? This week at Just Add Ink Nikki has asked us to just add wings.


Of course I had to choose a butterfly as my wings. Here's my card.


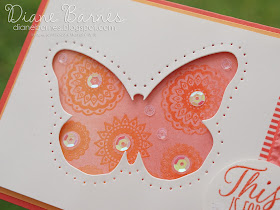
I used a technique called watercolour lifting to create the stamped & coloured panel. SU's Brandi Barnard demonstrated the technique beautifully in this video & I've shared the steps I used below. Here's a closer look at the coloured panel... although you can't see the shimmer & shine that well in this pic.


Watercolour Lifting Technique
1. Watercolour wash - use aquapainter to wash at least 2 ink colours over a piece of card. I used watermelon wonder & peekaboo peach on shimmery white card. Love that shimmer & it's beautiful to colour with.
2.  Clear emboss images - using versamark, clear embossing powder & heat tool. I used images from the Paisleys & Posies stamp set.
3. Remove some of the wash colour using a clean aquapainter. Leave card to dry (or use a heat tool if you're impatient). 
Repeat step 2 & 3 to emboss more images at remove more colour if you'd like.

When finished, the initial deep colour wash is protected behind the embossed images & the rest is lightened. This pic better shows the shine of the embossing & shimmer card. The colours are much more pink irl (darned night photos).


Back to the rest of the card...
The layout is very clean & simple to make. Cut the butterfly shape from some shimmer card (you can use either the Bold Butterfly or Butterflies die sets), then pierce around the edges free-hand using the slightly embossed impression of the die edge as a guide. Finish the panel off with some striped washi (Affectionately Yours) & ruched ribbon. I embossed the sentiment from the Tin of Tags stamp set (not just for Christmas!) using versamark & watermelon wonder ink.


I popped the white panel onto the embossed layer with dimensionals, then a peekaboo peach layer & watermelon wonder base. Done! This pic shows the sheen quite well.


and one more to show the inside with another embossed piece.


So, what do you think - do you like my wings? Check out all the JAI team's winged projects on the Just Add Ink blog & try the challenge yourself.

Thanks for visiting today & come back soon for some more ideas.
Inky wishes, DiPS. Here's a collage image you can pin for later inspiration before you go. Remember too you can see & order all the supplies I used using the links below.


Supplies
To see & order any items used in today's project, just click on the items below to see them in my Online Store. You can order from me if you live anywhere in Australia. I would love to be your Demonstrator if you don't already have one.  Please allow "Demonstrator contact" in your preferences so I can thank you properly when you place your order.
Note - Stamp sets & bundles noted below may be available in other mount options (eg wood, cling rubber or photopolymer). Please check the online store if your preference is different.

Versamark Pad
$15.00
Heat Tool
$50.00
Big Shot
$159.00

Tuesday, 27 September 2016

Foxy Friends 2 - for big & small guys

I promised more foxes so today I'm sharing a couple more projects. First up, is a foxy encouragement card.


 Foxy is definitely not just for kids. I teamed Foxy Friends here with a fantastic new stamp set called Here For You, that's filled a much needed gap in my sentiments. It has lots of real life words of encouragement for when life brings difficult times, using modern handwritten scripty fonts. Here's what's included. Useful, huh?


I've used Mr Fox simply, stamping him in cajun craze & memento black inks, then stamping an extra head to punch & pop up on dimensionals. I've kept the rest of the card simple, using the sahara sand base embossed with the Woodland folder. A little copper washi (Affectionately Yours pack) adds some warmth & works beautifully with Mr Fox that's best seen in real life.


Foxy birthday boy

This time I created a little forest scene for the birthday fox. I've used a pretty neutral palette for this one too.


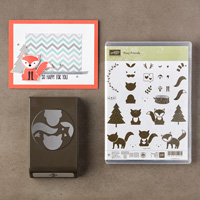
I stamped & punched out Mr Fox's body, head & tail pieces separately, using the same template method as Brenda Quintana here, & sat him on the stump in the stamp set.


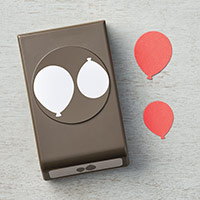
Mr Fox needed a celebration so I stamped & punched some balloons (Balloon Celebration stamps / Balloon Bouquet punch) & set him in a fun forest scene. The trees are also from Foxy Friends.

Mr Fox got another look-in on the inside, teamed with my favourite birthday sentiment of this year & possibly ever, Stylized Birthday. I think this layout could make a super easy card front too - with the white trimmed down & a touch of dsp maybe :)


So, are you enjoying my Foxy projects? Missed some?- see them all HERE.
I have more animals to show you so pop back again during the week to see them. Thanks for visiting today. Remember to pin the cards for later, before you go & check out my supply lists below to see & order the supplies I've used.

Inky wishes, Di

 
Supplies
To see & order any items used in today's project, just click on the items below to see them in my Online Store. You can order from me if you live anywhere in Australia. I would love to be your Demonstrator if you don't already have one.  Please allow "Demonstrator contact" in your preferences so I can thank you properly when you place your order.
Note - Stamp sets & bundles noted below may be available in other mount options (eg wood, cling rubber or photopolymer). Please check the online store if your preference is different.


Foxy Here For You


Foxy Birthday Boy
Print Recipe