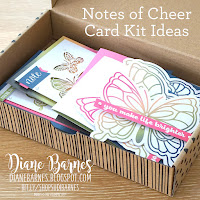
 The Notes of Cheer Kit includes everything you need to make 9 cards - 3 each of 3 designs. All for just $21 (plus $5.95 shipping) & it comes in the fun decorated box pictured above.
It's super quick and easy to make with no stamping. A new card maker could easily make them, you could make
with kids, or gift a kit. You'll have a stack of pretty cards to
give or send in a flash.
I'm not a huge kit user but the colours and butterflies in this one caught my eye. I'm also a slow card maker so kits are a great way to quickly have a stack of just because cards ready to send. I hope my cards give you some ideas to try with your own kit.
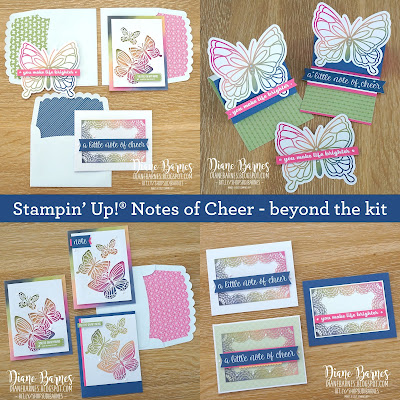
Here's what I made.
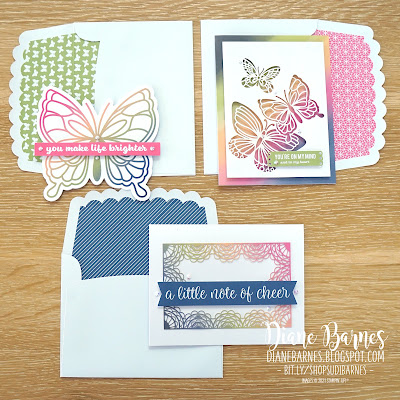
Let's take a closer look. These cards are the 3 card kit designs and matching envelopes. Cute huh? The laser cut shapes are so intricate.
Here's each design and how I stepped them up simply.
Design 1 - Large Butterflies
These were the element that sealed the deal that I needed the kit. Who wouldn't want to open an envelope & find a colourful butterfly inside? This inspired me to create simple easel cards with the other 2.
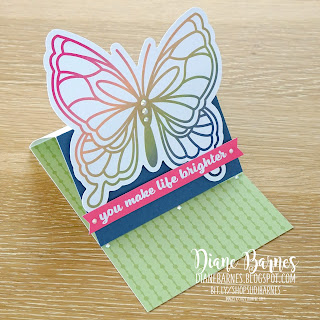
Easel 1:
Instructions
- Start with a top folding white card base (Full card sheet cut in half longways).
- Score and fold the card front in half to form the easel.
- Adhere a piece of Misty Moonlight card to the bottom half of the front.
- Adhere butterfly card together or cut off the back, then adhere onto Misty Moonlight half of card front using Dimensionals (as shown in pic)
- Apply 3 kit rhinestones to butterfly body as shown.
- Trim 'you make life brighter' sentiment to add banner ends, then adhere as shown with Dimensionals.
- Adhere a piece of patterned paper to the inside ( I used Subtles collection - Pear Pizzazz)
- Apply 3 kit rhinestones onto patterned paper where shown, to enable easel front to stand up.
- Apply some clear Wink of Stella if you have some (everyone should) to parts of the butterfly.
- Folds flat to post. Note you'll need a standard envelope to post, unless you make the base slightly smaller. I forgot that. ;)
Easel 2:
- Base is Polished Pink instead of white. It would still work with white.
- Pear Pizzazz paper is smaller - covering just past the sentiment.
- The sentiment is from card design 3. I added bits of leftover pink card from the kit behind it, then popping the whole piece up on Dimensionals.
- The butterfly is upright rather than on an angle.
I kept the lovely laser cut butterfly cards simple.
- Left - Kit design. It's hard to see but the laser cut panel is popped up on dimensionals.
- Top - I changed the sentiment, creating a banner with the 'note' sentiment from one of the other language sentiments included, and flipped the laser cut piece.
- Bottom - I cut down the die cut & multi-coloured card front and mounted them onto a Misty Moonlight card base using Dimensionals, Cutting it allowed me to change which colours were visible behind the laser cut. I also cut down the sentiment and added a scrap of pink from the sentiment pieces and some pearls. Here's a closer look.
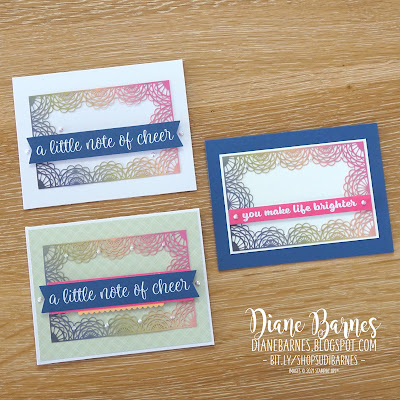
The lacy laser cut for this kit is very pretty so I didn't want to add much.
- Top Left - Kit design. I left off a papaya sentiment piece - oops!
- Bottom Left - I added a layer of simple patterned paper to the base & some scrap strips of pink behind the sentiment. Some kit rhinestones placed between each lacy section adds sparkle. There are lots in the kit so you can be generous.
- Right - I mounted the lacy laser cut onto some which card (scraps from the kit), popped the 'you make life brighter sentiment' from design then popped it onto a Misty Moonlight card base. Lots of bling from the kit on this one too. Here's a
closer look.
So that's my take on the Notes of Cheer kit. Add a kit to your next order and try some of them or go with your own. Pin this pic on Pinterest for easy finding later.
Thanks for visiting today. Pop back soon for more stamping ideas & related shenanigans. Leave a comment if you have any questions or would like more information.
Happy stamping & inky wishes
Di
PS: Almost forgot - watch Sara Douglass, SU CEO make the kit cards to see how easy they are & to follow along if you like.
SHOP PROJECT SUPPLIES HERE IN MY ONLINE STORE
.png)








No comments:
Post a Comment
Thanks so much for taking the time to leave me a comment. I really love hearing from you.
In line with new data protection legislation (GDPR) by commenting you do so in the knowledge that your name & comment are visible to all who visit this blog and thereby consent to the use of that personal information for that specific purpose.