Friday, 20 March 2015

JAI 255 Just add eggs-ovals: Mr Bunny's Easter eggs

It's time for a new challenge at Just Add Ink & this week is Just Add Eggs or Ovals. Heaps of options! I decided some Easter cuteness would be fun so I started with a bunny, then thought about eggs & finally this is what I came up with - a bunny & Easter eggs pop up card made with ovals!
Cute Mr Bunny was perfect for the challenge as he's mainly made with oval framelit dies & oval punches. He was designed by SU's Carrie Cudney & shared on the SU Corporate blog & I pinned it ages ago for future cuteness needs. He looks like he doesn't know where to start with all the eggs around his Easter wonderland. I'd be like that if they were chocolate too).
I backed the four large DSP eggs (Best Year Ever paper - free during Sale-a-bration - as is the ribbon) with card to make them stronger & attached the three largest eggs (two largest oval dies) to the card base back. I sponged all the egg & bunny pieces too. I made a pop-up support for the smaller egg (4th largest oval die). I also made a longer pop-up support for Mr Bunny. You can see the structure here & how to make him below.
Making Mr Bunny
 
Mr Bunny is made with the these dies & punches.

Body: 1 x 3rd largest oval die
Arms: 2 x smallest oval die - cut approx in half with a curved edge
Legs: 1 x smallest oval die - cut in half
Ears: 2 x smallest oval die
Ear inside: 2 x large oval punch (blushing bride)
Eyes: owl punch - 2 x medium eyes (white) & 2 x small eyes (early espresso)
Nose: cupcake punch - 1 x cherry (blushing bride)

The finished card definitely made me smile & even my teen daughter said it was really cute. Hope you like it too & leave a comment if you do...or if you have any questions. Remember to check out all the DT's fab creations & try the challenge yourself. Until next time...
Inky wishes,
Di

Supplies
To see & order any items used in today's project, just click on the items below to see them in my Online Store. You can order from me if you live anywhere in Australia. I would love to be your Demonstrator if you don't already have one. Please allow "Demonstrator contact" in your preferences so I can thank you properly when you place your order.

Tuesday, 17 March 2015

Masculine teen happy birthday - crazy about you

Don't you love those times when you need a card now, it comes together quickly, & you love the result. It doesn't happen near often enough for me, but thankfully it happened when I needed this card for a cool, teen family friend.
Most of the reason it came together quickly was thanks to this fab card by Diana Eichfeld, which I found on my travels & filed away to try. I really loved the layout, texture with just a bit of grunge. I'm also obsessed with the Crazy About You die & stamp bundle too so that helped. This is one layout I'll definitely be using again.

Teen guys are a tad difficult to shop for so we decided to go with cash - not something I often do but a good choice here - so I included a pocket on the inside. I used the hello honey stripe DSP (Lullaby) & grunge theme from the front too. I also added '17' using the Perfect Prints number dies. Did you notice I cut a little off the numbers to make them smaller - worked well I think.
I was amazed how quickly this came together & very happy when the teen recipient said it was a really cool card - wow! If you like it too or have any q's, leave some comment love here & on Diana's original too. Until next time...
Inky wishes, Di

Supplies
To see & order any items used in today's project, just click on the items below to see them in my Online Store. You can order from me if you live anywhere in Australia. I would love to be your Demonstrator if you don't already have one. Please allow "Demonstrator contact" in your preferences so I can thank you properly when you place your order.

Friday, 13 March 2015

JAI 254 colour challenge - thankful Sheltering Tree

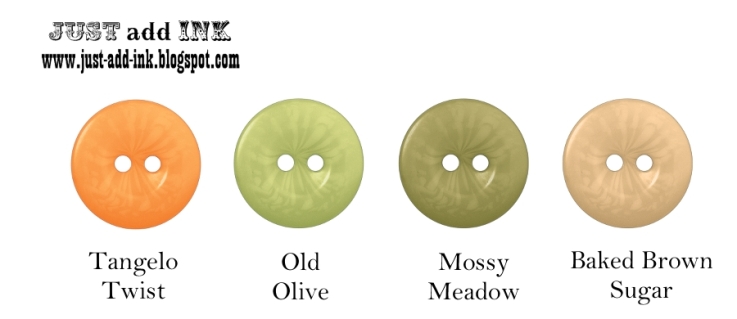
We have a lovely Autumn toned colour challenge for you this week at Just Add Ink. Perfect to welcome Autumn here in Australia. Not that you'd know it's Autumn yet with the hot days.
The colours suggested a nature theme to me so I thought the beautiful Sheltering Tree stamp set would be perfect. What do you think of what I came up with?
What did I do?  Stamped the tree trunk in baked brown sugar, then the leaves with old olive ink & tangelo twist. I also sponged a little old olive ink over the top to add some softness. Then I mounted the circle panel over the tree panel with dimensionals, & wrapped around some tangelo & mossy meadow ribbons. Some tiny pearls on the tree & sentiment finished off the look for me. Here's a closer look at the tree.
Remember to check out all the different JAI Design Team gals' creations & play along with the challenge too here on the blog. Leave me a comment to let me know what you think about my card or if you have any questions.
Until next time, sending you inky wishes
Di

Supplies
To see & order any items used in today's project, just click on the items below to see them in my Online Store. You can order from me if you live anywhere in Australia. I would love to be your Demonstrator if you don't already have one. Please allow "Demonstrator contact" in your preferences so I can thank you properly when you place your order.

Sunday, 8 March 2015

Swinging balloon birthday card

Totally forgot to share this fun swinging balloon birthday card I made for a friend's birthday back in January.
What makes this a swinging card? Well, when you move the card, the balloon bottom & streamers swings from side to side, kind of like a pendulum. The very clever Teneale Williams showed how to make them swing at the Sydney Party Time Event earlier in January so I had to try it out - so easy & fun. I'd never seen these before but I'm sure you'll all see them here again.

I kept the card pretty simple (& very similar to Teneale's original) - one of those last minute creations. ;-) I used the Celebrate Today bundle (stamps & framelits) for the balloon elements (a photo-polymer set, so super easy to line up) & Butterfly Basics for the sentiments. Added texture comes from the spotty embossed background & the lost lagoon ribbon. The inside is super simple too - matching balloon & sentiment - but I think finishes off the look. I couldn't stop shaking the card when I finished, much to my darling husband's amusement.
Leave me a comment if you'd like me to share how to make the swinging element. If I get enough requests, I'll make a tute. Thanks for visiting today & hope you liked the project.
Inky wishes, Di

Supplies
To see & order any items used in today's project, just click on the items below to see them in my Online Store. You can order from me if you live anywhere in Australia. I would love to be your Demonstrator if you don't already have one. Please allow "Demonstrator contact" in your preferences so I can thank you properly when you place your order.