Wednesday, 12 October 2016

Moroccan double z fold card for guys


Today I'm sharing the first card from my recent Just for Men class, which was timed to give my lovelies a choice of making their cards for Father's Day, birthdays or anytime they liked.
The thing I really liked about this design is it's so adaptable for any occasion or person. Just change the word & paper to suit. But I digress...

Double z fold cards are hugely popular at the moment and this one shows two of my favourite tips for guys cards:
1. Create interest (& even better, bamboozle the guys) with a fancy fold
2. Use paper to add colour & pattern
3. Make impact with a great sentiment

Here's how the the double Z fold looks when the card's open. Actually it folds more in the direction of an S than a Z looking at it now. Who knew ;)

I stamped the 'happy' letters (Large Letters stamp & die bundle) in night of navy ink, cut them out, then popped them on dimensionals along the front of the smaller z fold so they really pop off the front. I attached the Father's Day sentiment in the space below with the aid of a small piece of card attached to the z fold.


The two paper patterns I've used are from the fab Moroccan DSP & oh my goodness I had one of those perfect cardmaking moments with the tiled pattern. It exactly fit the size & fold locations in the card. I wish I could say I planned it that way but truly was a very, very happy accident.

Here's another pic so you can see that how the 'happy' & Father's Day sentiment pops off the front.
 

The main z fold base is made with a piece of card 10.5cm x 28cm (approx equivalent to a half sheet of 8-1/2 x 11 inch card) & the second z fold piece is 2.5cm x 28 cm (3/4 x 11 inches). This makes the scoring measurements easy. Simply score both pieces at 7cm & 14cm for perfect folds.

Cutting & Scoring Tips
* As with most fancy folds, accurate cutting & scoring is essential. This is such an easy & effective fold.
* If making multiple cards, cut the base & strip pieces separately. You'll get 2 bases from the one sheet. 
* If you're making just one, cut & score the base & strip together, so the score lines match exactly.

This pic shows how the base looks when flat.


and from the back. I stamped a sentiment from Grateful Bunch & drew lines around the panel to reflect the paper colours on the front.


If you'd like me to share my measurements & a tutorial to make my double z fold card, do leave me a comment & I'll see what I can do.

In the meantime, here's a combined image to pin for later inspiration. I hope you'll try making a double z fold card, and I bet you can't stop at making one. The fold is so easy but creates such a fun look. Check out the supply list below to see and order any supplies you need.

I'll be back with another project soon so pop back again on Friday. Until then...

Inky wishes
Di


PS: Don't Miss this! - The Moroccan DSP I've used here is part of our Buy 3, get 1 free October DSP offer so check out all the details here.

Supplies
To see & order any items used in today's project, just click on the items below to see them in my Online Store. You can order from me if you live anywhere in Australia. I would love to be your Demonstrator if you don't already have one.  Please allow "Demonstrator contact" in your preferences so I can thank you properly when you place your order.
Note - Stamp sets & bundles noted below may be available in other mount options (eg wood, cling rubber or photopolymer). Please check the online store if your preference is different.


Big Shot
$159.00

Saturday, 8 October 2016

Foxy Friends 3 - friends of the fox

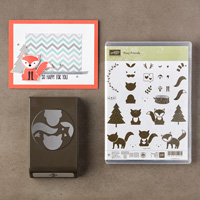
Punches & our builder punches are so useful beyond their stated purpose & the fab fox builder punch is no exception. Today I'm sharing more cards from my Foxy Friends class. I made a few sample cards a similar layout, with different themes & colours. Each person choose which theme, paper, & animal they wanted to make.

1. Flower the Skunk
SU gave us some animal ideas in the catalogue including a cute skunk. Being a Disney girl, the skunk reminded me of Flower the skunk from Bambi, so I made one with some flowers. I teamed it with a perfect skunky sentiment from Here for You. This card really makes me smile & so I hope it makes you smile too.


Skunk punch pieces

Fox Builder punch: Black card: body, head, tail
                                White card: muzzle, tail tip for hair fringe & chest,
                                tail (re-cut in punch for stripe).
Blossom Bunch punch: Melon mambo flowers
Stamps: Foxy Friends eyes/nose


I continued the colour theme with a print from the Pop of Pink dsp pack for the background. Then created a little cluster behind Flower, keeping it simple with the Swirly die (Swirly Scribbles dies) & circle stamp from the Perfectly Wrapped stamp set.

2. Birthday Polar Bear

This sweet little polar bear is the cute star of this kid's birthday card. He's a variation of the bears I shared here. I used the same swirly circle elements as the skunk card in different colours (bermuda bay, pool party) & paper from A Little Foxy dsp stack. Then I added some balloons ( & my favourite birthday sentiment from the Birthday Banners set. Some of my class lovelies added a number to their balloons too.


Polar bear punch pieces
Fox builder punch: white body, head (cut ears off & turn head upside down)
Owl builder punch: ears - large white & medium smoky slate circles, paws - medium white circles, watermelon heart
Foxy Friends stamps - paws & eyes/nose

I carried the theme to the inside too.


3. Baby Congrats Polar Bear


Then I changed up the birthday card to make a baby card too - polar bear makes a sweet baby too.
I used pool party & smoky slate for the same swirl-circke combination, to team with a pretty, dotty paper from the A Little Foxy pack. I added a basic grey Congrats die cut & sentiment from the Sunshine Sayings stamp & die bundle & a few scattered hearts (owl punch).


Baby polar bear is exactly the same as the birthday one above.

4. Baby Girl Polar Bear


Last but certainly not least in this marathon post is this  baby card I made for dear friends who were blessed with a beautiful baby girl in August. I can honestly say I've never been more happy or excited to make a baby card, although that paled in excitement to the hugs & cuddles when we got real life hugs with them all.

Anyway, I used a similar layout to the other 3 cards, substituting the swirly circle with a pair of hearts from the Sunshine Sayings Bundle stamp & die bundle & using a heart print paper from A Little Foxy.


Baby bear is the same as those above except I gave her smoky slate paws & used the muzzle piece to make some arms to hold the heart. The colour scheme is pink pirouette, pool party & rose red. I added some ribbons behind the sentiment for softness & shine.


On the inside I added a sentiment from the cute Made with Love stamp set


I hope this marathon post has inspired you to try using the same layout in different ways & of course try making some more fun animals with Foxy Friends. I shared lots of other animals with my class, which I will share here another time.

In the meantime, here's a collage of all 4 cards for you to pin for later inspiration. I've listed all the supplies for each card below, so you can check them out & order any you'd like.


Back soon with lots more ideas to share.
Inky wishes
Di

Supplies
To see & order any items used in today's project, just click on the items below to see them in my Online Store. You can order from me if you live anywhere in Australia. I would love to be your Demonstrator if you don't already have one.  Please allow "Demonstrator contact" in your preferences so I can thank you properly when you place your order.
Note - Stamp sets & bundles noted below may be available in other mount options (eg wood, cling rubber or photopolymer). Please check the online store if your preference is different.


1. Flower the Skunk


2. Birthday Polar Bear
Print Recipe

3. Baby Congrats Polar Bear


4. Baby Girl Polar Bear


All Cards


Big Shot
$159.00