Tuesday, 21 February 2012

Harry Potter Owl pocket card

I've something a little different to my beloved butterflies to show you today - a Harry Potter-themed pocket card featuring my favourite owlie friend, dressed up as Harry.
(click pic for a bigger image)
I made this for Cara to give Damien for his birthday back in November. She had a great idea to get Damien tickets to the Harry Potter exhibition at the Powerhouse Museum in Sydney.....yes, we're all big Harry Potter fans, so I want a Harry themed card. I also love dressing up owlie, so I went had a bit of a play & came up with what you see here. I also tried a bit of curling & distressed  for a more vintage look...well, as distressed as I do anyway.
Anyhoo, here is Harry Owl for his close-up - very simple, but I think kind-of Harry like. All the bits as made using shapes from the owl punch.
I wanted to include the tickets in the card, so a pocket card was the best option. I found a couple of free HP like fonts online & used them for the inside message. Cara was pretty impressed with that!. By the way, the card front is approx 21cm x 10cm & fitted a DL envelope.
It was a lot of fun to make & it made Damien smile, so that's a win in my book. Hope you like it too.
That's it for me tonight - must finish the post before my battery runs out. Thanks very much for visiting. Hope you pop in again soon.
Inky wishes, Di

Supplies
Stamps: Curly Cute
Card/Paper: basic black, whisper white, riding hood red (textured card), Patterns DSP (neutrals pack)
Ink: staz on black, black stampin' write journal pen
Accessories: black satin ribbon, silver brads
Tools: owl builder punch, Big Shot, Circles #2 die

Saturday, 18 February 2012

Another enchanted butterfly

Well I didn't get back here as quick as I expected, but at least I'm here now to show you the card I made for Leesa, to match the butterfly frame I made for her.
It's a very simple & well used layout, but I liked how it turned out...I can't help myself with those butterflies. Like the frame, I used the SAB Everyday Enchantment DSP & Patterns DSP. I also used the ribbons & a brad from the SAB accessories pack. I like the subtle shimmer that the ribbons added to the card....even if it doesn't show in the pic....so here's another angle. This one shows off my new sentiment stamp set - Friendly Phrases, which includes 2 of my fave fonts & such lovely sentiments.
 I kept it simple on the inside of the card. Just some DSP, card & more butterflies just for good measure.
I hope you're not getting too sick of butterflies. I seem to have had a real obsession with them, looking through my card pics...& I haven't even shown you them all!
Thanks very much for visiting & leave me a comment to say hi if you have time. I love hearing from you. Until next time, inky wishes
Di

Supplies:
Stamps: Friendly Phrases
Card/Paper: pool party, calypso coral, poppy parade card, Everyday Enchantment DSP, In Colours 11-13 Patterns DSP
Ink: early espresso
Accessories: everyday Enchantment accessory pack (SAB) - brad & ribbons
Tools: Big Shot, Beautiful Butterflies die, Beautiful Wings die,

Thursday, 16 February 2012

Everyday enchantment butterfly frame

Today's project was a gift I made for my lovely friend Leesa's birthday. She loves butterflies, so I came up with the idea to make a shadow box frame with my butterfly dies & I have to say was thrilled with how it turned out.
The whole frame (which I got at Ikea ages ago) is about 71cm x 31cm & is about 5cm deep. The white border is part of the glass & the base sits well below the glass. This leaves heaps of space for some beautiful 3d butterflies. Here's a close up of each window.
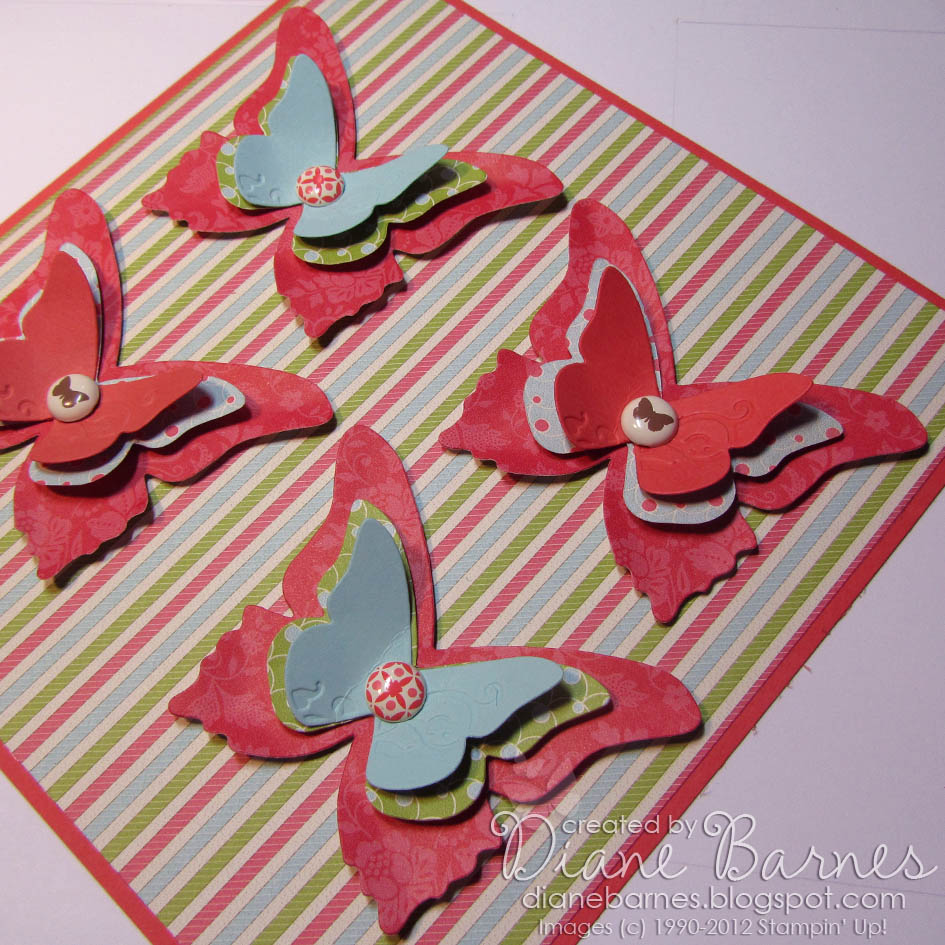
The butterflies are of course cut using my fave Beautiful Butterflies die & Beautiful Wings embosslit die. "What's that beautiful paper" you say? Well, the backing & butterflies are mainly the Everyday Enchantment DSP pack,  made especially for Sale-a-bration, teamed with a little of the in-colour Patterns DSP & a little calypso coral & pool party card. The butterflies are finished off with some antique brads (large butterflies) & Sale-a-bration brad pack (smaller butterflies).

The butterflies are lightly curled at the edges & popped up with many, many, many dimensionals to keep them in place - some are 3-high! Here are some angled pics I took before the butterflies went in the frame, so you can see the layers better. Unfortunately, they were taken at night with dodgy lighting, so the colours are a little off.
I was so happy with how it all turned out & even better that Leesa really loved it. I think I'm going to have to make another one for me too. Hope you like it too. If you have any questions, please leave me a comment.
I'm out of time for now, so I'll have to show you the matching card I made for Leesa next time.
Until then, thanks very much for visiting & come back soon.
Inky wishes, Di

PS: In case you've missed the Sale-a-bration buz, you can earn the paper & brads I used here FREE during Sale-a-bration, which runs until the end of March.
You can find out more about Sale-a-bration HERE, or by contacting me

Supplies (all Stampin' Up! unless noted)
Card/Paper: Everyday Enchantment DSP (SAB), In-colour 11-13 Patterns DSP, calypso coral & pool party card
Accessories: Antique brads, Everyday Enchantment brads (SAB)
Tools: Big Shot, Beautiful Butterflies die, Beautiful Wings embosslit die
Other: frame from Ikea

Tuesday, 7 February 2012

Poppy Butterflies for JAI 103

Hi there. Today I actually have a new project to show you (shocking I know). I'm trying to get back into my stamping groove & have quite a few cards to make & thought a challenge would be a good way to get me started. So, I checked out the latest challenge at the fab Just Add Ink, which is JAI103 - just add red & white.
I thought the challenge would be pretty easy, but the red & white was a little trickier in practice. The one easy choice was using the butterflies. There's just something about them that I can't resist at the moment & I had my two butterfly dies already on my desk, so I went for it. Anyway, without any further waffle, you can see what I came up with.
I cut the butterflies from some retired poppy parade DSP & cardstock. I also used some of the Sale-a-bration DSP pack for the bottom mat. Initially, I stamped the white stripe embossed panel with a swirly stamp, but thought it was a little busy, so I changed it. I distressed the edges of all the mat pieces. I popped the sentiment inside one of the embossed designer frames, which I cut out & mounted on dimensionals. The butterfly edges are sponged & popped with dimensionals & not forgetting the cute brad from the SAB accessory pack.
Here's a different angle to show the layers better:
Anyway, hope you like what I came up with. Leave some comment love if you have any q's or just want to say hi. Bye for now.
Inky wishes, Di

Supplies:
Stamps Elements of Style
Card/Paper: poppy parade, riding hood red, whisper white card, In-colour 10-12 Patterns Hostess DSP pack (retired), Everyday Enchantment DSP (SAB)
Accessories: white taffeta ribbon, Everyday Enchantment brads pack (SAB), basic pearls
Tools: Big Shot, Beautiful Butterflies die, Beautiful Wings die, Designer frames embossing folder, stripes embossing folder, sponge dauber

Wednesday, 1 February 2012

Inlaid embossing fun with K's

Todays card is one I made for a friend who wanted to give a special 40th birthday card for a friend. While asking what her friend might like, she said the friend was having a themed party where everyone had to come dressed as something beginning with the letter K, as the birthday girl's name begins with K - fun huh! So, with that in mind, this is what I came up with:
 As you can see, I've used the inlaid embossing technique again with the square lattice embossing folder. I just love the look this gives. The K & the 40 is from the timeless type junior alphabet die set & I think it was perfect for this, since it's almost square. I thought it might look too plain with just the K's so I added some itty bitty punched flowers before I embossed & some little rhinestones after.
The card is a tall one - The front is approx 21cm x 10cm from memory. This was a hurried photo, so the colours are not quite right, but you get the idea ;0)

It's been a while since I made this, but I'm pretty sure at the time I thought of the lovely Sarah Klass's card with numbers to get me started (coincidentally a 'K' too!). Thanks again Miss S.
My friend liked what I came up with & hopefully the birthday girl did too.

Thanks very much for stopping by. Hope you liked the card & hope to see you again soon.
Inky wishes, Di

Supplies
Card/Paper: baja breeze base, rose red, regal rose, whisper white, lots of Subtles collection scraps for the K's
Accessories: basic rhinestones, celery grograin ribbon (retired)
Tools: Big Shot, square lattice embossing folder, Timeless Type junior alphabet dies, circles #2 die, 1 3/4 inch cirle punch, itty bitty punch pack

Tuesday, 31 January 2012

Loving Best of Everything

I'm still catching up with posts, as the lovely ladies who received today's cards will realise. As most of you won't have seen them & that I really liked them, here we go anyway! They're all using the Best of Everything set, which still makes me smile every time I see or use it.

First up is one I made for my gorgeous stamping friend Kim.
The birdie & branch are actually sparkly in real life, as they're stamped with frost white shimmer paint, coloured with reinkers. The colours are concord crush, melon mambo & lucky limeade. The spotted paper & flower swirl papers are from the Cheerful Treat hostess only DSP pack & are one of my fave papers from this year. The happy birthday wishes image is from the fab Petite Pairs set.
I've used the dotted scallop ribbon, dotted side down with some cotton twine for my bow. I carried the paper to the inside too:
I made the next card for my dear friend Wendy's birthday. It's similar to the first & used many of the same supplies. This time, I used a crumb cake (kraft) base with melon mat. The stripe DSP & concord crush DSP is also from the the Cheerful Treat DSP pack.
And one more simple card before I go....I made this little thank you card with some leftover pieces I had on my desk. It was really quick & easy, but I think it's cute.
Hope you like these cards, as much as I liked making & giving them. Thanks very much for visiting & if you have any questions or would just like to say hello, please leave a comment. I love hearing from you. Until next time,
Inky wishes, Di

Supplies:
Best of Everything 1
Stamps: Best of Everything, Petite Pairs, Happiest Birthday Wishes (hostess)
Card/Paper: concord crush, melon mambo, lucky limeade, whisper white card, Cheerful Treat DSP (hostess)
Ink: elegant eggplant, lucky limeade reinkers, frost white shimmer paint, concord crush ink pad
Accessories: basic pearls, melon mambo dotted scallop ribbon, cotton twine (non SU)
Tools: itty bitty punch pack

Best of Everything 2
Stamps: Best of Everything, Petite Pairs
Card/Paper: crumb cake, melon mambo, whisper white card, Cheerful Treat DSP (hostess)
Ink: elegant eggplant, lucky limeade reinkers, frost white shimmer paint, melon mambo ink pad
Accessories: basic pearls, melon mambo dotted scallop ribbon, cotton twine (non SU)
Tools: itty bitty punch pack,  scallop edge punch. Big Shot, Circles #2 die (largest circle)

Best of Everything 3
Stamps: Best of Everything, Petite Pairs
Card/Paper: crumb cake, melon mambo, whisper white card, Cheerful Treat DSP (hostess)
Ink: elegant eggplant, lucky limeade reinkers, frost white shimmer paint, perfect plum ink pad
Accessories: basic pearls, celery grosgrain ribbon (retired)
Tools: Big Shot, Square Lattice embossing folder, itty bitty punch pack

Friday, 27 January 2012

My Christmas card...& more tags

This is it...finally my last Christmas project from 2011 & it's my Christmas card.
Unfortunately, circumstances meant I didn't get to finish or send most of them, but I wanted to post it here anyway, as I was really happy with how it turned out & disappointed I didn't get to send our Christmas greetings to friends & family. I did think about using it for next Christmas, but decided to show you all instead.
Here's a closer view, so you can see the detail a bit better. (which I still have to show you!).
The colours are wisteria wonder & elegant eggplant. I've always had a thing for purple & I love love love this monochromatic combination.

This card includes some of my favourite images & things. I'm sure you recognise Dasher the reindeer. I combined him with the gorgeous Peace on Earth (from Four the Holidays), Merry Christmas (from Delightful Decorations) & a beautiful image from the new Charming set in the Summer Mini. Charming isn't a Christmas set, but I just HAD to use the image as it's soooo pretty. I clear embossed it on the purple card (much shinier irl). The ruffled wisteria ribbon is just yum & the top note shape got a little nod too!...as well as many punches!

Anyway, while I'm raving about the Charming image, I made matching Christmas gift tags using it & the scallop tag from the Two Tags die. The light was bad when I took the pic, so the eggplant doesn't look quite right.
I also used it for tags on Cara's school dance teachers gift bags which I made with DSP.
Jolly Bingo Bits is back
And finally before I go, I have two more tags to show you using Jolly Bingo Bits.
Cara had a male teacher this year - always tricky for gifts. I decided to go with a more manly night of navy & riding hood red combo for the tags & used the star/snowflake from Jolly Bingo Bits. I like how the smaller image lets you layer the punches & not obscure the lovely scallop stitching....which I realise in hindsight is not very manly, but c'est-la-vie! I'm sure he still liked the wine inside the bag!
His second gift had a definitely more manly look too!
Anyway, I think that's it for Christmas for me. I hope even though that Christmas is gone for 2011, that my projects give you some inspiration for this year...or the next.
Until next time, inky wishes from me.
Di

Supplies:
My Christmas card
Stamps: Dasher, Four the Holidays, Delightful Decorations, Charming
Card: wisteria wonder, elegant eggplant, whisper white
Ink: elegant eggplant ink pad, versamark pad
Accessories: wisteria wonder ruffled ribbon, basic pearls, clear embossing powder
Tools: Big Shot, Top Note die, Circles die, Circle Punches -1 3/8 inch, 1 1/4 inch, 3/4 in, 7/8 inch, heat tool, embossing buddy
Eggplant Charming Tag
Stamps: Charming, Four the Holidays
Card: whisper white, elegant eggplant
Ink: elegant eggplant ink pad
Accessories: basic rhinestone
Tools: Big Shot, Two Tags die, Circle Punches -1 3/8 inch, 1 1/4 inch
Riding Hood Red Tag & Bag
Stamps: Charming, Four the Holidays
Card: whisper white, riding hood red, choc chip, retired DSP
Ink: riding hood red
Accessories: Accessories: riding hood stripe ribbon (retired)
Tools: Big Shot, Two Tags die, Circle Punches -1 3/8 inch, 1 1/4 inch
Melon Mambo Tag & Bag
Stamps: Charming, Four the Holidays
Card: whisper white, regal rose, melon mambo, Flirtatious DSP
Ink: melon mambo
Accessories: white organza ribbon
Tools: Big Shot, Two Tags die, Circle Punches -1 3/8 inch, 1 1/4 inch
Jolly Bingo Bits tags
Stamps: Jolly Bingo Bits, Four the Holidays
Card: whisper white, night of navy, riding hood red
Ink: night of navy
Accessories: riding hood stripe ribbon (retired)
Tools: Big Shot, Two Tags die, Circle Punches -1 1/4inch, 1 inch

Thursday, 26 January 2012

Happy Australia Day!

Just popping in quickly to wish Happy Australia Day to everyone. Hope you've had a great day celebrating our beautiful country with friends & fun.
...and from Cara, Harry & Jaz......."Aussie Aussie Aussie!"

Tuesday, 24 January 2012

Punch Pal Christmas treats

I'm sure you're getting sick of seeing Christmas projects, but I couldn't finish without showing you some little treats I made for Cara to give to some special buddies at the end of the year.

Hanging Penguin Shaker Ornaments
First I made these little hanging Christmas shaker ornaments using some sweet treat cups for her special buds & school dance teachers.
The little penguin from the very cute Punch Pals set is stamped in elegant eggplant, coloured in with markers, then cut out & mounted him on a stamped background. The sweet treat cup is filled with a mix of faux snow & dazzling diamonds glitter & is quite sparkly in real life. The remainder of pieces are either punched or die cut. See the supply list below.

Here's what they look like from the back. The cute snowman is is from the Tags til Christmas set. He's just stamped in elegant eggplant & coloured with a red marker.
If you want a more boy suitable version, you can omit the white piece & it looks like this
I got this fantastic idea to use the treat cups like this from fellow Demonstrator Michelle Grech. You can see the fantastic Christmas trees she made here. Thanks so much Michelle!

I took photos of each construction step to make a photo tutorial, but I haven't had time yet. If I get enough comments requesting one, I'll consider getting back to it.

Snowman Treats
I needed to make some more treats & realised the little bags I'd bought didn't fit the choccies I bought (sigh), but Damien the wonder husband came to the rescue with some pre-packed marshmallow swirls. These said "snowman" to me, so I stamped, coloured & punched the cute little snowman from Punch Pals to make a little topper. These were really quick, but I think they were really effective.
Here's a close up version. Some are coloured a little more girly & mounted on melon mambo & some more neutral & mounted on celery. On the back, I made a custom greeting in word to say Merry Christmas from Cara...but no pic!
Here's how they looked all packaged together...
Jelly Bean Treats
Finally, I made some some Christmas jelly bean treats, which were really colourful....& yummy. These had another greeting from Tags 'til Christmas & a little greeting from Cara on the back...which you can see in a couple of them below.
Anyway, I hope these give you some ideas for treats. Of course, you could easily change the colours & stamps to suit birthdays, Easter, Valentines Day etc.

Thanks again to Michelle for sharing the idea for the sweet treat shakers & thanks to you all for hanging in with my Christmas projects. I'm sure I only have one more Christmas project to show you now - my own Christmas card - & then I'll move on.
Until next time...
Inky wishes, Di

Supplies
Hanging Ornament
Stamps: Punch Pals, Tags 'til Christmas
Card: real red, bashful blue, whisper white card
Ink: elegant eggplant ink pad, real red, elegant eggplant, pumpkin pie markers
Accessories: dazzling diamonds glitter, sweet treat cups.
Tools: Big Shot, Perfect Pennants die (white doily), circle punches - 2 3/8 inch, 1 3/4 inch

Snowman Treat
Stamps: Punch Pals, Tags 'til Christmas
Card: certainly celery, melon mambo, whisper white card
Ink: soft suede ink pad, real red, elegant eggplant, melon mambo, certainly celery, wild wasabi, choc chip markers
Tools: 2 3/8 inch scallop circle punch, circle punches, 1 3/4 inch circle punch

Jelly Bean Treats
Stamps: Tags 'til Christmas
Card: real red, whisper white card
Ink: real red ink pad
Tools: scallop square punch

Sale-a-bration Starts Now!

Yes, it's the time of the year we love love love - Sale-a-bration is here...& this year it's bigger & better than ever with even more free goodies to choose from & a super special when you join Stampin' Up . Can you tell I'm excited?
Everything you need to know is in the fantastic Sale-a-bration catalogue but here's a summary.

When does the fun happen?
Sale-a-bration (SAB) starts today & continues until 31 March 2012.
You can earn free goodies during SAB in two ways:
Spend:
Every $100 you spend on any catalogue items, earns you one exclusive free SAB item of your choice.
Host:
If you host a Stampin' Up! workshop with total sales of $600 or more, you'll earn one SAB item of your choice free.
Workshops can be hosted in your home, or you can simply collect orders from friends & family to earn your freebies.
What goodies are available?
You can choose from stamp sets, a designer paper pack, or a brad & ribbon pack. All the available items are shown below  Bet you can't choose just one favourite.
These items are ONLY available during Sale-a-bration & can only be earned - not purchased.
(click the pic for a bigger image)
Join the fun & save on our Starter Kit!
During SAB, you can purchase our fabulous full Starter Kit for just $249 AND get choose an additional catalogue stamp set of your choice for free.
If your wishlist is massive & you'd like to receive a discount on everything you buy, or have been thinking about how Stampin' Up! could help pay for your hobby or become a business, Sale-a-bration is your time. Check out my SU website HERE for more info & give me a call for a totally no pressure chat.

You can also find out more about Sale-a-bration & download the SAB brochure  here on the SU website.
If you'd like a SAB catalogue or you have any questions about anything SU related, please don't hesitate to contact me.

My new stamping room is almost finished, so I actually have a place to stamp. Hopefully I'll get a chance to play with some of my pre-ordered SAB goodies (just another perk of being a Demonstrator).
Back soon I hope.
Inky wishes, Di