I haven't made many 3d & fancy fold cards lately but when I spotted the lovely Patty Bennett's Pinwheel Tower cards & tutorial, I knew it would be perfect to send to a dear friend who also loves a fancy fold. It's surprisingly easy to make, especially thanks to Patty's tips. I adapted the size of my card to work better with A4 card & metric measurements. It's approx 21cm x 14.5cm folded flat.
I've used lots of my current & new fave stamps and dies to make it, including the Biggest Wish stamp set, Stitched Greenery die and Pierced Blooms dies. If you've seen my recent cards, you'll have spotted some too.
This is a super photo heavy post so let's get started with a look at the finished card.
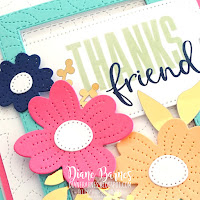
I considered this opening view as the front. The card is quite thick when flat so this is the only section where I've popped up and layered elements. The front set the scene to carry themes through the card.
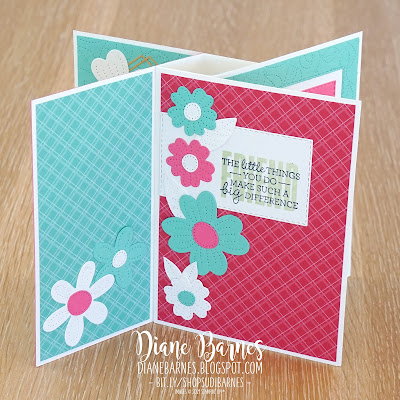
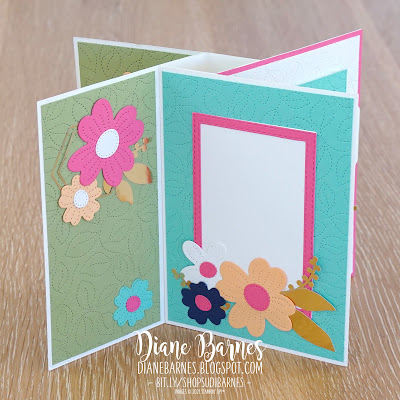
Here are sections 2, 3, & 4. Each has it's own look while maintaining continuity of elements across the whole. Read on below for more info about each section.
Amazingly, only 4 pieces make up the basic card. A long piece that's scored to make the square centre and 1 vane of the pinwheel, and 3 rectangle pieces that attach to the centre to make the remaining 3 vanes. Patty shows this very well in her video.
As I mentioned above, the card folds flat for posting. This version is approx 21cm x 14.5cm flat and fits a C5 envelope (normally used for half A4 sheets). Here's how each side looks flat and some notes about the design.
This is how the recipient will see the card when it comes out of the envelope. Note that you can see the whole of the smaller left panel plus part of the next page, so bear that in mind when you're choosing colours & elements for your version.
These are the main elements used on the front and throughout the card:
- Raised frame using the Stitched Greenery die & Stitched Rectangle dies.
- 'Thanks friend' sentiment from my most used current stamp set, Biggest Wish, teamed with the largest Tailor Made Tags die. If Biggest Wish is not on your shopping list yet, you must add it now as it's so fun & flexible for so many people & occasions. (See all my other Biggest Wish cards here if you need more convincing).
- Die cut flowers cut from the Pierced Blooms die set. I love, love, love these dies. There are so many shapes included for you to mix and match.
- Gold foil frame & leaf elements from
the Expressions in Ink Ephemera pack. I love how they delicately contrast with the bold flowers.
Section 2:
I used 2 paper prints from the Brights Collection stack (Coastal Cabana & Melon Mambo) here, plus a sentiment from the Pansy Patch stamp set combined with the large 'friend' image from Biggest Wish.
Section 3:
I included another stitched frame and gold foil hexagon frame & leaf elements from the Expressions in Ink Ephemera pack and another sentiment from the Pansy Patch stamp set.
Section 4:
The final section includes another stitched frame, blank this time for a personal message.
I hope you've enjoyed seeing my first Pinwheel Tower card and are inspired to make your own. Please leave me a comment if you do like it, and if you'd like more information about how I made my version.
See and shop all the supplies I've used here on my Stampin' Up Store.
I have some more Pierced Blooms cards to share with you soon so keep an eye out for those.
Happy stamping & inky wishes,
Di
.png)


2 comments:
OMG, Di! What a gorgeous card! The colours are wonderful - the whole card is so bright and cheerful. I'm sure that your friend will love it!
Thanks heaps, Tina. It was fun to make & the recipient did love it. That makes it all worthwhile.
Di
Post a Comment