Thursday, 10 March 2011

A zebra for baby Thumper

Today, I have a happy baby card to show you – one I made to welcome beautiful baby Thumper to my lovely friend Sam’s family. I know Sam has received it, so it’s safe to show you all now.
My inspiration for the card came when I looked at the cute little zebra on the little baby gift set I bought for Sam. I thought I could make a punch zebra to match, so out came my many punches & off I went. It took a little fiddling & he looked a little strange for a while, but I was happy with how he turned out in the end.
Then, I made a little habitat for him using some retired kiwi ‘Walk in the Park’ DSP & scallop square die (again!). The ‘welcome sweet little baby’ message is made using some words from the Fabulous Phrases set from the Summer Mini, which is another favourite recent purchase.

I carried the theme to the inside of the card too using some of the ‘Wild About You’ animals which I inked up with markers, then repeated the scallop square & DSP. The sentiment is from’ God’s Blessings’.
Here’s a pic of the card with the Pumpkin Patch gift set I was inspired by. You can see the little zebra on the front of the bodysuit & some other very cute animals.

More about the punch zebra...
Here are the shapes I punched/cut if you’d like to make your own zebra. Some are cut freehand & some punches are retired, so you may have to improvise if you don’t have them.

head & muzzle: 2 step owl punch - body
ears: word window punch
hair:  2 x spring bouquet flowers punch (retired)
eyes: small crop-a-dile circle
nostrils & ear crease – horizontal slot punch
body: freehand rectangle – 1 corner rounded (retired corner rounder punch)
legs: - freehand
feet – quarter inch circle (retired) cut off at top
stripes & tail – freehand

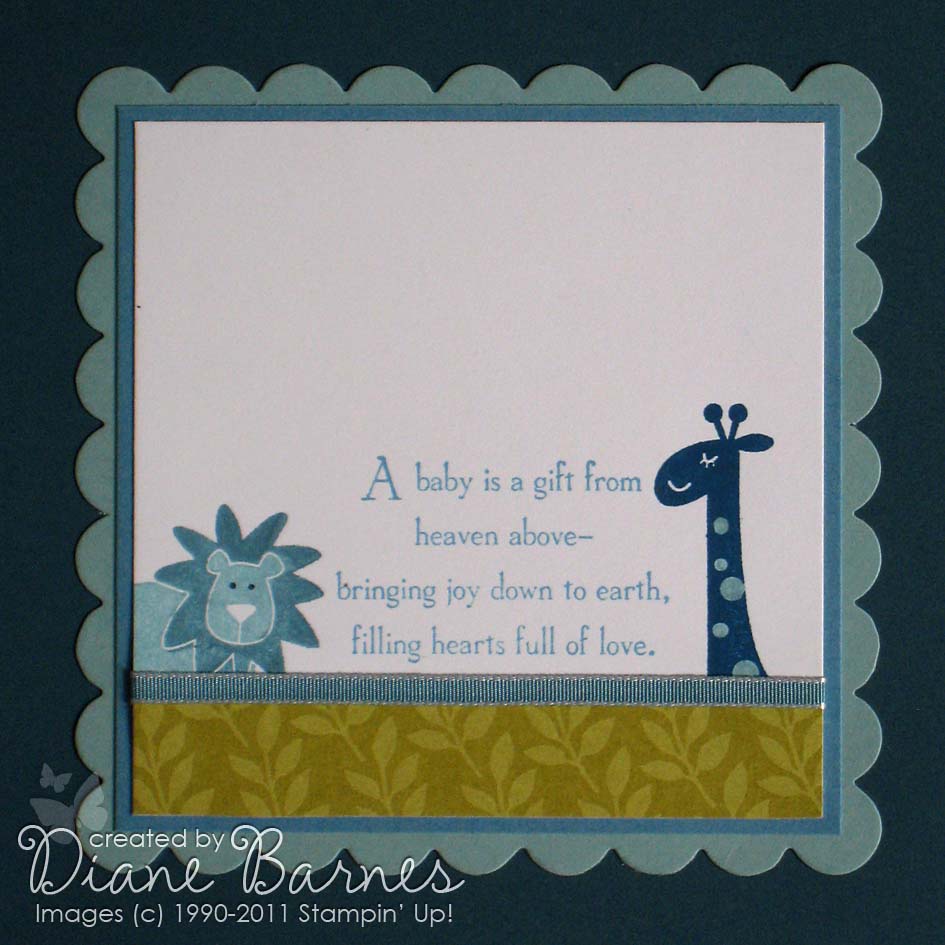
Here is a final pic to show you the little tag I made for the wrapped pressie, also using ‘Wild About You’ & Fabulous Phrases. The package was wrapped in tissue paper stamped with the lion & giraffe from ‘Fox & Friends’ but photoshop has decided not to co-operate, so can't show you it!
Thanks for stopping by & hope you liked my little zebra. Just drop me a line or comment if you have any questions. Hope you're having a happy day.
Inky wishes, Di

Supplies:
Card/paper: not quite navy, kiwi kiss (retired), marina mist, baja breeze, whisper white card, Walk in the Park DSP (retired)
Ink: not quite navy, marina mist, baja breeze ink pad/Stampin' Write® markers
Tools: Big Shot, scallop square die, Square Lattice Embossing Folder (Summer Mini), crop-a-dile
Retired punches: spring bouquet, horizontal slot, large corner rounder, ¼ inch circle

Thursday, 3 March 2011

Breanah’s Birthday Bakery

Woo hoo, 3 posts in 3 days!...but don't get too excited! I'm still working on catching up on some past projects rather than making newies, but at least I'm here. Today's card is one I made for a very cute 6 year old friend of Cara back in October.
I've coloured the yummy little row of cakes from 'Birthday Bakery' (level 1 hostess set) with my markers & then added some glittery dazzling diamond highlights. The number 6 has been mounted on some circles & a scallop circle (with a little more glitter). To make the scallop circle look more like the scallop trim edge, I punched holes in each scallop with my crop-a-dile. I could have been a little more patient with this part, but think it works OK. You can see the details closer here (but don't look too close, LOL).
I think everything else is pretty clear, but if you'd like more info on anything, just drop me a line. Until next time, thanks for stopping by & leave some comment love if you're liking what you see...or not for that matter!
Inky wishes, Di

Supplies:
Stamps: Birthday Bakery, (level 1 hostess set) Party This Way (birthday greeting)
Card/Paper: rose red, regal rose, whisper white card, Sweet Always DSP (I think!)
Ink: jet black staz-on ink pad, regal rose, pretty in pink, rose red, so saffron, certainly celery Stampin' Write® markers
Accessories: certainly celery 5/8 inch grosgrain ribbon, dazzling diamonds glitter
Tools: punches – scallop trim, scallop circle, 1 3/8 & 1 ¼ inch circle, word window, crop-a-dile

Wednesday, 2 March 2011

Party This Way

Today, I'm heading back to last year to show you some cards I made for friends of Cara using the fun 'Party this Way' stamp set. All of these cards are variations of a make & take from the last SU Convention. I love the square layout as I it's really easy to make a very quick card or a more detailed one....depending on how much time is available. It's also a great way to use up scraps. Anyway, here we go...
...First up is my favourite – a very girly version in regal rose & chocolate with lots of DSP & raised stamped, punched or die cut layers. The number 10 was cut with the Timeless Type sizzlet alphabet
Next up is a much simpler version in razzleberry, using the original four square layout from the convention make & take.
Finally, a simple version for a boy. This also includes the 4 square layout, but this time, I used mainly stamping & placed the squares on a normal size base.
Hope this has given you some ideas of how you can use 'Party This Way' & vary a design to get different looks. If you have any questions, just let me know.
See you again soon....I hope.
Inky wishes, Di

Supplies:
All Stampin' Up!® unless stated
Stamps – all cards: Party This Way

Girly pink & chocolateCard/Paper: regal rose, pretty in pink, chocolate chip, whisper white card, Sweet Always DSP
Ink: Regal Rose, chocolate chip ink pads
Accessories: silver brad
Tools: Punches – heart to heart, boho blossoms, word window; Big Shot, Timeless Type Junior Alphabet dies

Razzleberry squareCard/Paper: rich razzleberry, whisper white card, Cottage Wall DSP
Ink: Rich razzleberry ink pad
Tools: Big Shot, Timeless Type Junior Alphabet dies (heart & number)

4 square boy
Stamps: Trendy Trees
Card/Paper: crumb cake, pacific point, kiwi kiss, tempting turquoise card, Good Morning Sunshine DSP
Ink: kiwi kiss, tempting turquoise, pacific point ink pads
Tools: word window punch, Big Shot, Timeless Type Junior Alphabet dies

Tuesday, 1 March 2011

Quick & simple as 1-2-3

Hi again!
When card making time is short (who am I kidding, isn't it always too short?), I try to simplify my cards by using a favourite layout, co-ordinated products & flexible images. Today's card is a good example of this:
...And here is a quick 1-2-3 guide so you can do it too.
1.  Choose some card & add a strip of matching dsp.
I've used blushing bride cardstock & some co-ordinating striped paper from the level 1 hostess 'In-Colour ' dsp pack. The card front is approx 9.9 x 9.9cm, so you can get 3 cards from an A4 sheet. Perfect for making a quick sets of cards or when you need multiples.
2.  Stamp a punch-able image.
I've used the very pretty floral stamp from the free 'Punch Bunch' Sale-a-bration set, which I love as it combines both a pretty image & sentiment and can easily be punched & layered.
3.  Add a little extra special detail.
I've added some pear pizzazz ribbon & a little pearl in the centre of the flower (still loving those pearls). You can see the image in more detail in this pic.
Another thing I like about this card is that I got lots of what I've used for free...
- The in-colour paper pack I've used includes a huge 60 sheets of 6 x 6 inch dsp to match our current in-colour selection & you can only get it free as a hostess benefit - by hosting a $300 workshop. With a $300 workshop, you'll also get to choose $30 of products of your choice to co-ordinate with it.
- Get the fantastic Sale-a-bration 'Punch Bunch' stamp set free only until the end of this month with a $100 order, or by hosting a $600 workshop.
If you'd like more info on workshops or Sale-a-bration, just drop me a line.
Inky wishes, Di

PS: sorry the pics are not so bright – it was a dull day when I made them & had to get them in the mail quick!

Supplies:
Stamps: Punch Bunch
Card/Paper: blushing bride, pear pizzazz, whisper white card, level 1 hostess 'In-Colour ' dsp pack
Ink: blushing bride, regal rose & pear pizzazz Stampin' Write® markers
Accessories: basic pearls, pear pizzazz poly ribbon
Tools: punches – scallop circle, 1 3/8inch & 1 ¼ inch circles, piercing tool.

Tuesday, 22 February 2011

Kellie’s Scallop Birthday

This morning, I'm tapping happily away in the relative calm of my stamping area, to get away from the noisy organised chaos of our kitchen/family room where our new kitchen cupboards are being installed. It's all going pretty well except for our new family room floor, where we found a damp spot that needs to dry out before we can lay the beautiful new timber. Unfortunately, this means that I probably won't be able to start my classes again until at the end of March at this stage, but trying to be patient with it all & look forward to our lovely new look. Anyhow, I'm sure you didn't come to hear about my renovations, so please say hello to today's card instead, which I made this for my dear & fabulous friend Kellie's birthday, which was on Feb 8th.
As you can see, I'm still a bit obsessed with the new scallop square die from the Summer Mini & writing this now I realise that just about everything else I've used is from the Summer Mini too. The tree is from the 'Love Defined' set, cute birdie & flower stamps are from 'Itty Bitty Bits' (& punched with one of the co-ordinating 'Itty Bitty Shapes' punches) & the greeting is from the appropriately named 'Fabulous Phrases' set (which combines my love of stamps & gorgeous fonts). Of course, I had to add some pearls to finish it off.
Here's a close up of the images, so you can see them better.
The tree was inked with espresso, regal rose & razzleberry markers, the birdie & flowers with razzleberry ink, & the greeting was inked in regal rose & espresso markers. Oh & the razzleberry spotty paper is from the Brights collection Patterns stack. Finally, here's the inside, where I repeated some of the elements from the front.
Before I forget, if you want to make the card base with the scallop square die, just fold your piece of card & place it in the die, so that it the fold won't get cut. Then, attach a whole scallop square to the front to hide the side without scallops.
I was really happy with how this card turned out & hope Kellie really liked it too, despite it going for a bit of a holiday in the mail before getting to her. I'd love you to leave a comment if you like what you see, or just to say hello. Until, next time, Thanks again for visiting & being patient with my slow posting during our renovation.
Inky wishes from Di

PS: Don't forget that items in the Summer Mini are only available until March 31, as are all the gorgeous free Sale-a-bration sets. I can place orders anytime. Also, even though my home classes are not happening just now, I can still come to your place to run a workshop or class, so you can take advantage of all the extra Sale-a-bration benefits. Just call or e-mail me if you'd like more information.

PPS: Most products listed have links to their catalogue page, so you can see the whole set or item. Just click on the name.

Supplies (All Stampin'Up!)
Stamps: Love Defined, Fabulous Phrases, Itty Bitty Bits
Card/paper: Early Espresso, Regal Rose, Whisper White, Brights collection Patterns stack
Ink: Early Espresso, Regal Rose, Rich Razzleberry Stampin' Write® markers, razzleberry ink pad
Accessories: Pretty in Pink 1/8 inch taffeta ribbon, basic pearls,
Tools: Big Shot, scallop square die

Thursday, 10 February 2011

Sunny square scallop easel

Hellllllllooo again. I have another easel card to show you today – this time a square scallop version I made for my lovely friend & SU team member Leesa.
Inspiration for the layout came from the fab Keesh's Inkspirations Challenge 55 sketch, as it was perfect for the scallop square I had in mind. I couldn't post it here while the challenge was live though, as I hadn't given the card to Leesa yet. Anyhoo, here's Keesh's sketch:
& here you can see the front in more detail:
The scallop square I used for the easel is the new clear die from the Summer Mini. For the front, I punched 1¼ inch squares from Sunny Garden DSP to make a patchwork base, then, added a punched birthday greeting from the 'Punch Bunch' free SAB set (loving this stamp – it's getting a real work-out) & a cute little owlie & cage from 'Aviary'. For the base, I fussy cut some more Sunny garden DSP & added a greeting from the beautiful 'Heard from the Heart' set. Some little pearls just finish it off (I'm obsessed with these at the moment).
Anyway, no time to stay & chat. We'll have no kitchen from tomorrow & I still have lots of little things to finish before then. Hope you have a lovely weekend when it comes. If you have any questions, just drop me a line.
Inky wishes, Di
Supplies:
Stamps: Aviary (Summer Mini) Punch Bunch (SAB), Heard from the Heart (IB&C)
Card/paper: peach parfait, pear pizzazz, poppy parade, Sunny Garden DSP
Ink: poppy parade, pear pizzazz
Accessories: 1/8 inch pear & daffodil delight taffeta ribbons, basic pearls
Tools: Big Shot, square scallop die, square scallop punch, 1¼ inch square punch

Tuesday, 25 January 2011

Ready...set...sale-a-brate

Today is the start of the most fantastic time of the Stampin' Up! year - yes, it's time to Sale-a-brate!
If you haven't experienced Sale-a-bration before, you're in for a real treat, as you can earn free, new & excusive stamps from now until 31 March.  How? Well, you can...

Spend
For every $100 order you place from the Idea Book or Summer Mini (before s&h), choose one of the 4 Sale-A-Bration set for free, no limits.
Host
Host your own Stampin' Up! workshop. For every $600 in workshop sales (before s&h), you can choose one Sale-a-bration set. This is in addition to the already fabulous hostess rewards you'll earn.
Join
Join Stampin' Up! & you can choose any stamp set from the Idea Book & Catalogue (valued up to $79.95) when you purchase the hugely discounted Starter Kit & become a demonstrator during Sale-a-bration.

Check out  the Sale-a-bration catalogue HERE & see some of the gorgeous ways you can use your free stamp sets. Just a note, Sale-a-bration stamp sets are only available during Sale-a-bration & will never be available again, so you won't want to miss them.

So how good does that all sound? If you'd like a copy of the catalogue, more information or to place an order just contact me.
Inky wishes, Di

Thursday, 20 January 2011

Mini desk calendar instructions & template

Wow, it's been a busy few days here. I was totally speechless that the fabulous Nancy Riley selected my little owl calendar in her last ipicks round-up (& those who know me know that's really hard, LOL). I really love Nancy's work & look forward to seeing all the amazing ipicks creations each week. I have no idea how you found me Nancy, but I feel very privileged to be included. Thank you so much.

I've also had lots of visitors from Kim Score's fantastic Paper Punch Addiction site, which I can't believe I hadn't found before, given how much I love my punches. Thanks heaps for featuring my calendar Kim. Your work is totally amazing & have add it to my google reader feeds so I don't miss anything.

Instructions & Template for Calendar
I've had lots of requests for the instructions to make the calendar & have e-mailed them to those who've asked already.  This morning, my clever husband told me that I could load the template up on windows Live (who knew?) so you could download it yourself. Cool! So...

& see all my calendar samples in this post.

If you do like the calendar or the instructions, I'd love if you could leave a comment to say hi!
Thanks for stopping by. Hope to see you here again soon.
Inky wishes, Di

Wednesday, 19 January 2011

Scallop circle easel cards

Since it's school summer hols at the moment & we're about to start renovating our floor & kitchen, stamping time is a bit hard to find, so I'm trying to catch you up on some projects that I haven't blogged yet. Today's post goes back to August, to show you two scallop circle easel cards I made for friends of Cara. You might remember I went through an easel card phase here & here & decided to try a different shape, easpecially after seeing the lovely Liam make some lovely circle versions. First up is Sarah's ... bright, fun & girly.
And one for Taylah...
I was trying for a bit of a Twilight inspired theme with Taylah's as she's a bit of a Twi-fan (as am I).  Choosing the colours was easy, but I was a bit unsure about images until I remembered my all-time fave flourish from 'Baroque Motifs', which I think worked with the swirly butterfly stamp.

Both cards share some other similarities - the Timeless Type big shot alphabet for the letters (no more running out of certain letters - love it!) & butterflies, but I think the look is quite different due to the colours & stamps. I was pretty happy with how they both turned out & I think the girls liked them too. Hope you do too.
Well that's all for now. Thanks very much for stopping by. Leave a comment if you like what you see, or would like more info.
Inky wishes, Di

Supplies
Sarah
Stamps: Flight of the Butterfly
Card: pixie pink, so saffron, whisper white, Petal Party kit DSP
Ink: pixie pink
Accessories: clear rhinestone brad
Tools: butterfly punch, trio flower punch, circle scissor plus, big shot, scallop circle die, Timeless Type alphabet

Twilight Taylah
Stamps: Butterfly Prints, Baroque Motifs, Flight of the Butterfly
Card: whisper white, real red, basic black
Ink:  real red, basic black
Accessories: silver brads, 2 way glue pen, dazzling diamonds glitter
Tools: butterfly punch, trio flower punch, circle scissor plus, big shot, scallop circle die, Timeless Type alphabet

Thursday, 13 January 2011

Something new for Cathy

Hi again. Today's project is one I made for Cathy, a lovely Diamond Stampers team member whose birthday was yesterday. Happy birthday again Cathy! I know Cathy has received her card, so I can safely show it to you now.
To make it, I inked up the heart flowers & stem (from 'Love Defined') with celery & rose red markers & added some cute punched flowers ('Itty Bitty Shapes') & basic pearls. Both the set & punches are new to the Summer Mini. Then, a first for me - I added some ruffled taffeta ribbon. I was happily surprised to see this is really simple to do & looks very effective I think. You can see it closer here:
If you'd like to try a bit of ruffling yourself, take some taffeta ribbon & pull one end until it starts to fray & expose the threads. Pull a centre thread & the ribbon will start to gather up. Push the gathers up the ribbon until you get the effect & length you want. Then, attach to your project with extra strong tape to hold it firm.
Oh & before I go, here's the inside of the card, which has some more flowers - this time with dry embossed centres.
Hope you liked today's card. If you have any questions about anything else, just drop me a line or leave a comment. Back soon with....
Inky wishes, Di

Supplies:Stamps: Love Defined (Summer Mini), Perfect Punches, On Your Birthday
Card: rose red, pretty in pink, whisper white, Brights Patterns DSP (olive)
Ink: certainly celery rose red markers, old olive ink pad
Accessories: olive/white taffeta ribbon (retired), basic pearls, dimensionals
Tools: Itty Bitty Shapes punches,  2 x 1 3/8 inch xl oval punch