Showing posts with label kits. Show all posts

Saturday, 28 December 2024

30 Christmas Cards - A Little Bit Festive

Set of 30 handmade Christmas cards using Stampin Up A Little Bit Festive, Peaceful Season, Snowflake sky folder, Reindeer Fun. Cards by Diane Barnes - Independent Demonstrator in Sydney Australia - colourmehappy - stampinupcards - stampinupchristmascardsSet of 30 handmade Christmas cards using Stampin Up A Little Bit Festive, Peaceful Season, Snowflake sky folder, Reindeer Fun. Cards by Diane Barnes - Independent Demonstrator in Sydney Australia - colourmehappy - stampinupcards - stampinupchristmascards

Hello and welcome! Wishing you all a belated Happy Christmas. I thought you might like to see some of the cards I sent to friends and family this year, so today I'm sharing a set of 30 cards I designed using the A Little Bit Festive paper and die cut pack.

This pack is a fun and very economical way to make easy, individual Christmas cards. The pack is only $17.50 a pack in Aus. I teamed it with basic cardstock, stamped sentiments, some embossing folders, and my favourite basic die shapes, to create a set of 30 cards. Of course they'll still look great if you keep it simple with just card, ink and paper.

This could be a great way to make a start on cards for 2025 so you're not running as late as me this year. Many of the key elements are now Last Chance items and some are discounted too.

Thursday, 14 December 2023

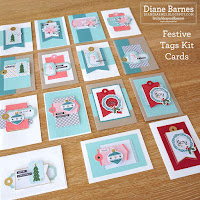
Festive Tags Kit step up to 15 Christmas cards

15 Handmade Christmas cards using Stampin Up Festive Tags Kit. Cards made by Diane Barnes - Independent Demonstrator in Sydney Australia. CAS cards - quick and easy cards - stampinupcards - colourmehappy - cardmaking15 Handmade Christmas cards using Stampin Up Festive Tags Kit. Cards made by Diane Barnes - Independent Demonstrator in Sydney Australia. CAS cards - quick and easy cards - stampinupcards - colourmehappy - cardmaking

Hello and welcome! Today I have 15 fun cards to share with you made with the fabulous Festive Tags kit. The kit was designed by Stampin' Up! to make 15 beautiful tags but it was really easy turning them into Christmas cards instead.

I loved the colours and images included, so over a weekend I played with the pieces in the kit and made 15 different cards. I added only cardstock (and some embossing with the Snowflake Sky 3d embossing folder).

I hope this idea will be helpful l to anyone like me who's still making Christmas cards, or  any super organised people prepping for next Christmas.
Take a look at how they turned out.
 

Friday, 5 November 2021

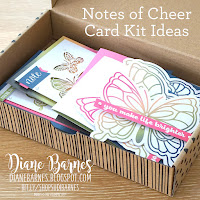
Notes of Cheer Kit - Quick & easy cards beyond the kit

Stampin' Up Notes of Cheer quick and easy card kit and alternate ideas. Cards by Di Barnes - Independent Demonstrator in Sydney Australia - colourmehappy - kit collection - sydney stamper - stampinupaustraliaStampin' Up Notes of Cheer quick and easy card kit and alternate ideas. Cards by Di Barnes - Independent Demonstrator in Sydney Australia - colourmehappy - kit collection - sydney stamper - stampinupaustralia

Hello and welcome! Today I'm sharing cards from the Notes of Cheer Card Kit and some alternative project ideas using basic supplies that you might like to try.

Wednesday, 16 December 2015

Christmas Shaker Cards - To You & Yours Kit

Back in November when Christmas still seemed quite far away, I ran two fun classes using the To You & Yours Shaker Card Kit...& then forgot to take pics of the cards. This kit includes 18 cards: 6 each of three different shaker card designs, including a tree, bauble, & star cards, each with their own shaker elements & foiled card base. This is probably my favourite SU kit yet, as the cards were easy to make but pack a big sparkly wow & I love interactive cards. Even better, Stampin Up! did all the work so I can play & be productive at the same time. My class lovelies chose how many cards they wanted to make at the class & I showed them how they could adapt the designs to create different looks.

Changing Up the cards
 I really enjoyed making the cards my own with some simple touches:
- Mixing up the card bases & shaker elements from the kit.
- Letting the lovely foil card bases shine by omitting the white shaker backing on most cards.
- using spare gold foil from kit to cut/punch/die cut extra shapes.
- Using matching sentiments from the Embellished Ornaments bundle (for outside & inside) on all cards.
- Using coordinated stamps & dies from the Peaceful Pines bundle with the leftover foil from the kit.
- Using gold cord on some cards for extra sparkle.
- I didn't use the To You & Yours stamp set that SU designed to coordinate with the kit since I had other supplies that coordinated so well with the kit.
So, here's what I made. Click on the pics to see better details.

Trees
All trees - Embellished Ornaments bundle sentiments
Tree 1 - Horizontal striped base, stamped tree (Peaceful Pines bundle). Spare foil - punched star & strip of gold under tree. Sequins glued inside the shaker.
Tree 2 - Diagonal striped base - I love how this looks like tinsel on the tree. Spare foil - punched star & die cut pot (Peaceful Pines bundle). Sequins mixed with glitter in the shaker - suggested by one of my clever class gals.
Tree 3 - Horizontal striped base. Spare foil - punched star & strip of gold. Sequins glued to outside of window.
Tip: want more trees? The large tree die in the Peaceful Pines bundle is the same size as shaker window.

Stars
Star 1 - kit sample except for some spare sequins glued on front & gold cord.
Star 2 - Horizontal striped base - moved sentiment to top. This is my fave star card even though I included too many stars in the shaker - go easy!
Star 3 -  Omitted gold foil border around shaker. Used kit sequins instead of stars & glued a few extra around the sentiment.
Tip: You'll only need to use half the shaker elements in the kit - use half!

Ornaments
All: No white backing piece on any card - love seeing the striped foil. Die cut real red ornament top from the Embellished Ornaments bundle
Ornament 1 - Moved sentiment. Adhered some spare gold stars to front.
Ornament 2 - Changed to landscape. Added some sequins on front.
Ornament 3 - this is mostly the kit version except for backing & addition of gold cord

Speaking of the kit, this is how Stampin' Up put the cards together with the coordinating To You & Yours stamp set.

So if you love this awesome To You & Yours Kit too, you're in luck. It's discounted in our Year End Sale from $35.70 (roughly $2 per card - bargain!) until 4 January, unless sold out first. To You & Yours stamp set is also reduced to $21.00. Get in quick for some last minute cards for to get started early on next years cards.  I've listed all the supplies used in my store list below, so check them out.

I hope you've enjoyed my ideas for the kit.  Leave me a comment if you like them or have any questions. Remember to pin for later too. I've created a collage of all the cards, ready for you to pin

Back soon with some more ideas. Thanks for stopping by today.
Inky wishes, Di

Supplies

To see & order any items used in today's project, just click on the items below to see them in my Online Store. You can order from me if you live anywhere in Australia. I would love to be your Demonstrator if you don't already have one. Please allow "Demonstrator contact" in your preferences so I can thank you properly when you place your order. Note - Stamp sets & bundles noted below may be available in other mount options (eg wood, cling rubber or photopolymer). I have listed the option that I used. Please check the online store if your preference is different.


Friday, 27 November 2015

JAI 290 colour challenge - sweet treat box

It's time for a new challenge at Just Add Ink & this week is a colour challenge suggested by the lovely Jan.
My first thought at the colours was 'gulp' as I don't think I've ever combined even two of them. After some pondering I realised the Cherry on Top paper pack included some fun combinations including a sweet donut pattern. This sparked a thought to make some sort of treat, so I decorated a sahara sand box from the All Boxed Up kit & the final sweet treat turned out like this:
Tag Tips
I cut 9 donuts from the Cherry on Top paper sheet shown below using the smallest circle framelit die - happily a perfect size so no hand cutting required (yippee!) - then I added some no-mess glittery sparkle with my clear Wink of Stella pen, but it's hard to see in the pic. Exciting news - Wink is coming to SU in January - double yippee! I've included some other glittery touches with glitter ribbon & a little glimmer paper on the banner.
The fancy curved top & notch on the tag is courtesy of the new Curvy corner trio punch - seriously a must have punch from the Holiday Catalogue (see it below). Bottom corners were rounded with our regular corner rounder punch. The sweet sentiment on the banner is from All Boxed Up stamp set which co-ordinates with the All Boxed Up Kit. Click on this tag pic & you might see the sparkle better.
Here's a final pic of the box from the side. I wrapped some more Cherry on Top paper, watermelon wonder card & glimmer paper around the perfectly neutral sahara sand box for that matchy-matchy look I love. Even the peg is watemelon wonder (also from the kit):-)
I think I'll fill my box with some skittles - smaller & less messy than donuts - & share with a fellow sweet tooth.
So what do you think - did I work the colours? Do check out all the DT's projects, try the challenge yourself & link up to share it with us.  We'd love you to play along.
If you'd like to make your own sweet treat boxes, all the supplies I've used are listed below. Click on the pics for more info & to order in my store.

Thanks for visiting. I have lots more to share once I get some photos taken, so back soon I hope.
Inky wishes, Di

PS: I may have bent the colour challenge a bit as my donuts are apparently cucumber crush, not garden green, but they certainly look the part to me.
PPS: the box I used is also available in the fab Baker's Box die set - make them in any colour you like!
See & Order Supplies
To see & order any items used in today's project, just click on the items below to see them in my Online Store. You can order from me if you live anywhere in Australia. I would love to be your Demonstrator if you don't already have one. Please allow "Demonstrator contact" in your preferences so I can thank you properly when you place your order. Note - Stamp sets & bundles noted below may be available in other mount options (eg wood, cling rubber or photopolymer). I have listed the option that I used. Please check the online store if your preference is different.

Saturday, 24 January 2015

Hello Life at Sydney Party Time

Time flies! This time last Saturday I was having a lovely time at the Stampin' Up! Party Time Demonstrator event at Waterview, Bicentennial Park in Sydney with 140 other demonstrators, so today I'm going to reminisce with some ideas from the day.
The event was organised by the super talented Teneale Williams with support from Stampin' Up! Australia & she put together a wonderful day. There was a very inspiring display with projects made by four talented demonstrators Dawn Ferguson, Chloe Evans, Katie Legge & Michele Le Breton.
There were more awesome ideas & samples shared in the presentations throughout the day too. I presented about Project Life, but I'll share more on that & some of my fave display projects next time.

I was also very lucky to be asked by Teneale to make some sample projects using the cool Hello Life Project Kit & coordinating products from our Occasions catalogue.
First up, I made one up, mostly as designed by Stampin' Up!  Miss Cara saw me putting it together & said it looked really cool so I decided to make it to hang in her bedroom.... which Cara was very impressed with indeed. Apparently a good teen gift according to my 13 yr old.
Everything you see plus lots more extras is included in the kit (see it here) & the coordinating Hello Life stamp set. The only other items I used were the whisper white & Memento black ink pads. One thing I must mention is the black chalkboard paper which works brilliantly with the white ink.

My inspiration board
I created an inspiration board for my stamp room with a second kit. I customised it with some of my favourite colours, stepped up some of the elements. I used the black, white & silver elements from the kit & added some pool party, coastal cabana, bermuda bay & calypso coral - simple!
If you'd like to make your own...
- Create board - has window sheet (acetate) piece in front of the paper to serve as a white board for reminders of cards & projects I need to make. I added some DSP backing card to make it thicker.
- Heart colours - Sweetheart & confetti hearts punches used for coloured hearts (they're the same size as heart elements in the kit).
- Stamps - from So You stamp set - perfect words in an all time fave font (Amelie - see my blog header?)
- Happiness quote - is a Project Life card from the Happiness Is collection.
- Enjoy die cut from the mini treat bag collection
- Pegs are from the in-colour collection - even though my colours are diff, they worked well.
- Shaker card 'happy' image coloured with Blendabilities
PS - the silver elements are definitely silver, even though they look gold-ish in the pic.

Fun with extras
I had lots of extra kit pieces to play with so I used them in some other projects like these mini treat bag treats. I forgot to take pics of the insides so I'll add some to the post later.
The coastal cabana bag has a thank you can with gift card inside. The black & white version has a clipboard with some Project Life grid cards ready to write on. I used a little leftover scrap DSP to cover the clip.

Since Valentines day is coming soon, I made some super quick curvy keepsake treat boxes too.
I could have made lots more with the extra bits & probably still will but I ran out of time before the event. That's all I have time for now so I'll say bye & hope to see you again here again soon.
Inky wishes, Di

Supplies
To see & order any items used in today's project, just click on the items below to see them in my Online Store. You can order from me if you live anywhere in Australia. I would love to be your Demonstrator if you don't already have one. Please allow "Demonstrator contact" in your preferences so I can thank you properly when you place your order.