Sunday, 25 September 2016

Fun with Foxy Friends 1

I introduced you to Foxy Friends & the fox builder punch bundle when I shared my bear family baby card, but I haven't shown you any actual foxes or other fun animals I've made with it, so over I'm going to share these over the next week, all going well.

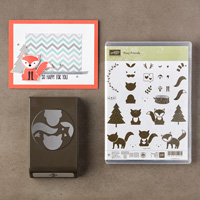
I love that the combination of the Foxy Friends stamps (see them all below) & punch gives you so many project options using either all stamped images, a mix of stamped & punched images, or all punched images. 

This is the first class project we made in my July classes, inspired by the multiple images in this cute card by Sherry.


For this one I used a combination of full stamped images with stamped-punched images.
First, I stamped 3 complete fox images onto squares of white card. Then I stamped & punched a 4th fox in pieces, using this quick, easy & economical method that Brenda Quintana shared here. Clever!
I mounted the 4th fox onto dimensionals & overlapped him on the square.


I chose 2 sentiments from the Crazy About You stamp set, including the super useful 'from all of us'. Some of my class lovelies substituted this for a happy birthday version.

On the inside I couldn't resist using some foxy paper from the A Little Foxy 6x6 inch dsp stack.


More about Foxy Friends
These are the 29 images in the stamp set - complete animals, separate animal parts, accessories & trees (that coordinate with the Perfect Pines framelit dies). Endless possibilities go
And here's the magic fox builder punch to cut those cuties & make friends with lots of your other punches too. You can see & order these & all the supplies I used by following the links below.
So, that's your first foxy taster. Thanks for visiting & I'll be back next time with some more foxy ideas.

Inky wishes, Di

Supplies

Friday, 16 September 2016

JAI 329 inspiration challenge - Swirly blooms

It's inspiration pic challenge time at Just Add Ink & this week we're taking our inspiration from this beautiful Spring image.


and this is what I made.


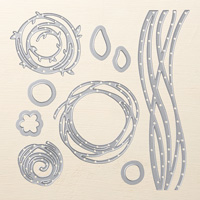
I kept looking at the inspiration picture & thinking coloured circles so I decided to go with that. My Swirly Scribbles dies got a work out lots of cutting swirls in an unusual for me combination of wild wasabi, melon mambo, flirty flamingo, calypso coral & daffodil delight, to replicate the tulip colours.

Then I adhered the swirls randomly to a piece of white card, then dry embossed it with the Seaside embossing folder - bringing back the inlaid embossing technique after a long absence with a new look. I'm always amazed how the finished embossed panel looks like a single piece of card after they're embossed. I matted the panel onto more melon mambo card & a wild wasabi base.
A simple scripty thanks sentiment played along nicely with the swirly to give a clean & graphic look. some metallic enamel shapes add a final touch of bling.

I carried the swirly look to the inside too.


This card could be replicated in so many other colours for different people & occasions. The darling man said it would be great in Christmas colours, so lets see if I try that :)

I think that's all I need to say about my card, except I encourage you to try some inlaid embossing - it's fun! All the supplies I've used are listed below & available to order from me.
Leave me comment before you go if you have any questions or just to let me know if you liked what I've made & remember to pin for later.

Now, pop over to the Just Add Ink blog to see how the team were inspired by the pic & play along with us too.

Until next time,
Inky wishes, Di


Supplies
To see & order any items used in today's project, just click on the items below to see them in my Online Store. You can order from me if you live anywhere in Australia. I would love to be your Demonstrator if you don't already have one.  Please allow "Demonstrator contact" in your preferences so I can thank you properly when you place your order.
Note - Stamp sets & bundles noted below may be available in other mount options (eg wood, cling rubber or photopolymer). Please check the online store if your preference is different.


Friday, 9 September 2016

JAI 328 Just Add P for Peter Pan

It's time for a new challenge at Just Add Ink & Tina would like us to...


... so our project can be anything beginning with the letter P. I've chosen Peter Pan & this is my card.


This is for the  Peter Pan loving friend of my DD's - the same friend I made this Peter Pan box frame shaker card for last year. I chose a Peter Pan quote for the front rather than a birthday sentiment in case she wants to keep it with her Peter Pan memorabilia.

All the supplies used are from Stampin' Up! as usual, but I was assisted by my Zing electronic cutter to cut the Peter Pan figures - yippee! there's no way I could cut those tiny figures on my own. I converted two printable pdfs (found on the Disney Family website - links below) to cuttable files & was amazed & very relieved that Mr Zing could cut such small, intricate shapes - Tink is no more than an inch tall I think.

The figures are cut from night of navy cardstock, which I clear embossed twice to give a really glossy look. You can't see this the pic but is very obvious in real life. This was the trickiest part, as the heat tool wanted to blow them all away!

I found a beautiful piece of retired Christmas dsp for the background to represent a starry night & cut a circle of silver foil for the moon. I created the sentiment in Word, printed it on whisper white card & popped it on dimensionals.

On the inside, I created a gift card pocket & a custom printed sentiment panel, with some more paper to carry over the theme. I can't show these as I forget to take pics before it was written on. Sorry!

Thanks for visiting today & I hope you've enjoyed seeing something a little different. Now, check out the Design Teams P projects on the Just Add Ink blog & try the challenge too.
Back soon with another project or two.

Inky wishes, Di

PS: You can find the printable pdfs I used at Disney Family.
Tinkerbell
Peter Pan, Wendy, Michael & John


Supplies
The paper used in the project is retired & not available to purchase. All current items are listed below.

To see & order any items used in today's project, just click on the items below to see them in my Online Store. You can order from me if you live anywhere in Australia. I would love to be your Demonstrator if you don't already have one.  Please allow "Demonstrator contact" in your preferences so I can thank you properly when you place your order.


Friday, 2 September 2016

JAI 327 colour challenge - Paisley thank you

Time for some Friday fun with a new Just Add Ink colour challenge. Jan suggested this wonderful colour combination of soft sky, dapper denim & calypso coral. Love it!


My brand new Paisleys & Posies stamp & die bundle got its first inking & oh my goodness I love it even more than I thought I would... which was a lot! The images are so beautifully detailed & work together so well together.


My card is very simple but the beautiful medallions add so much interest. I used five of the stamps in the set in dapper denim ink & partially coloured them with calypso coral & soft sky markers - quick & easy. I stamped & cut more medallions (with the dies - no fussy cutting here) then layered them in a curve across the card, with a final one on some retired calypso coral ribbon, under the thank you sentiment from Flourishing Phrases. I think the script font really works well with the images in Paisleys & Posies. Some rhinestone bling finishes off the look.


I added a few cut medallions on the inside too.


So that's my card - simple & elegant I think. Do you love the Paisleys & Posies set too?
Now head over to Just Add Ink blog to see all the different ways the team have used this brilliant colour combination. Before you go, pin the image collage below for later inspiration. Follow the links to see & order the supplies I used today. Thanks for visiting & come back soon.
Inky wishes, Di


Supplies
To see & order any items used in today's project, just click on the items below to see them in my Online Store. You can order from me if you live anywhere in Australia. I would love to be your Demonstrator if you don't already have one.  Please allow "Demonstrator contact" in your preferences so I can thank you properly when you place your order.
Note - Stamp sets & bundles noted below may be available in other mount options (eg wood, cling rubber or photopolymer). Please check the online store if your preference is different.